Quick-Start Guide
Welcome to the Quick Start Guide for the PROTO Profiles & Options plugin!
In this guide, we will:
- Set-up required Project Settings for our project.
- Make our first Category of Savefields, and our first Savefield.
- Create a simple Blueprint accessing our new Savefield.
Enable the Plugin
Once you’ve downloaded the plugin, you’ll need to enable it in your project.
Open your project editor, and navigate to Edit > Plugins, then in the plugins window type “proto” in the search bar. Find the PROTO Profiles & Options plugin, and check the box to activate it. You will probably need to restart the editor for changes to take effect.
Find Plugin Example Content
Open the Content Browser.
To see plugin content, you need to enable certain filters. Navigate to Settings in the top-right, and enable both Show Engine Content and Show Plugin Content.
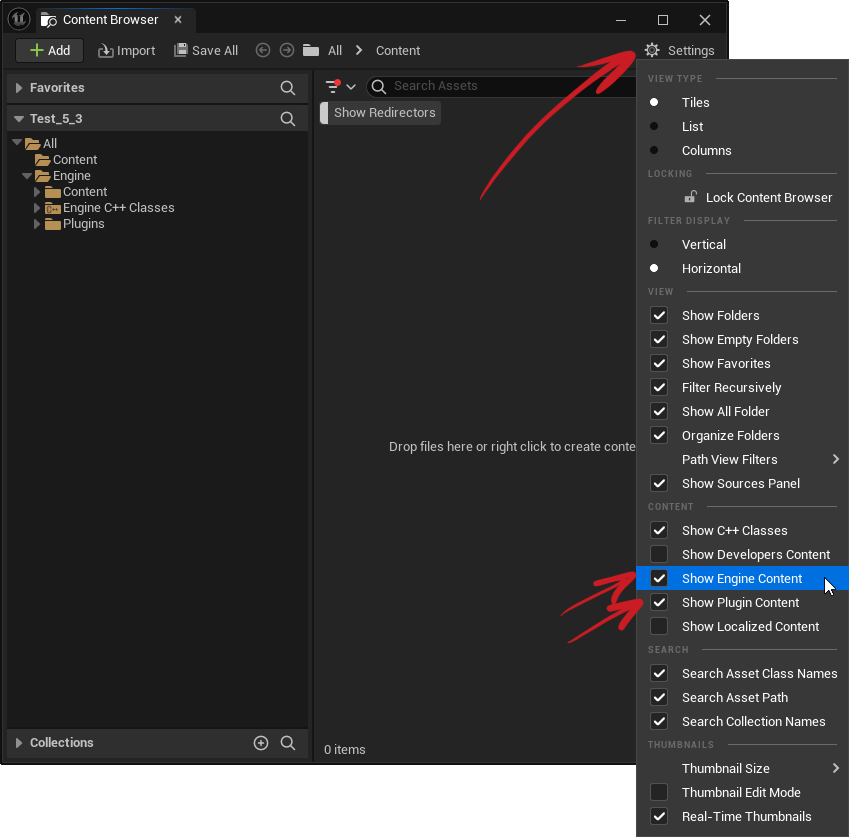
Now, in the Content Browser you can navigate to the Engine / Plugins / Proto Profiles & Options folder.
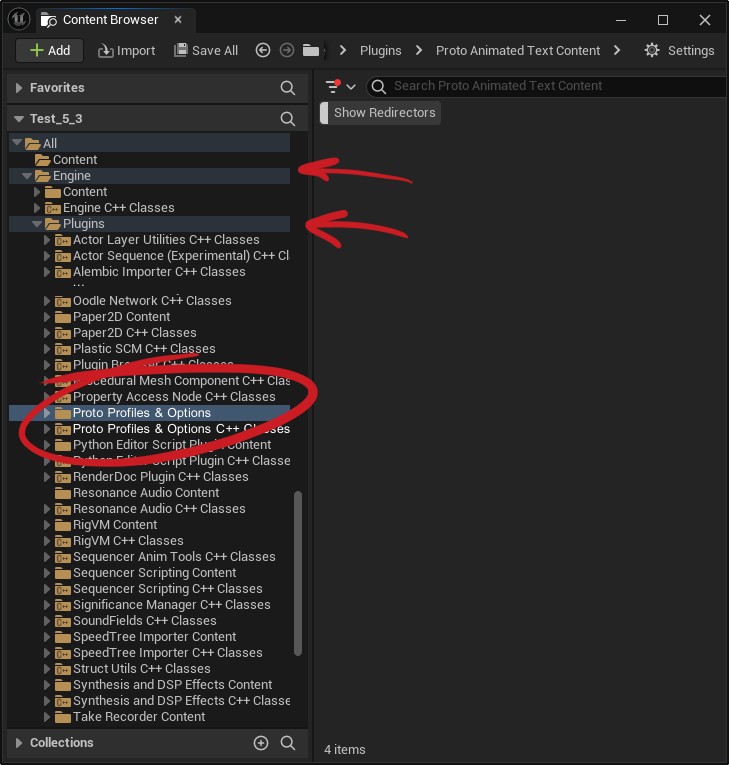
Here’s a quick overview of the included example content:
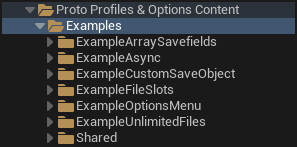
- ExampleArraySavefields
- Simple test setting, getting, and saving arrays of savefields.
- ExampleAsync
- Simple test of asynchronous open and save operations with large amounts of data.
- ExampleCustomSaveObject
- Simple test setting, getting, and saving CustomSaveObject type savefields.
- ExampleFileSlots
- An implementation of file slots for player game saves.
- Has a simple menu where you can save up to 4 games, copy/delete file slots, and open a slot of your choice.
- ExampleOptionsMenu
- An implementation of a PC Options Menu.
- Contains a fully functional Graphics tab, and stubbed examples of game options and key binds.
- ExampleUnlimitedFiles
- An implementation of a save system where players can save any number of save games.
- Has a simple menu where you can start a new game or continue an old save.
The Shared folder contains assets shared between examples.
Set Project Settings
In order for the plugin to work, you have to specify what DataTables contain your project’s savefield data.
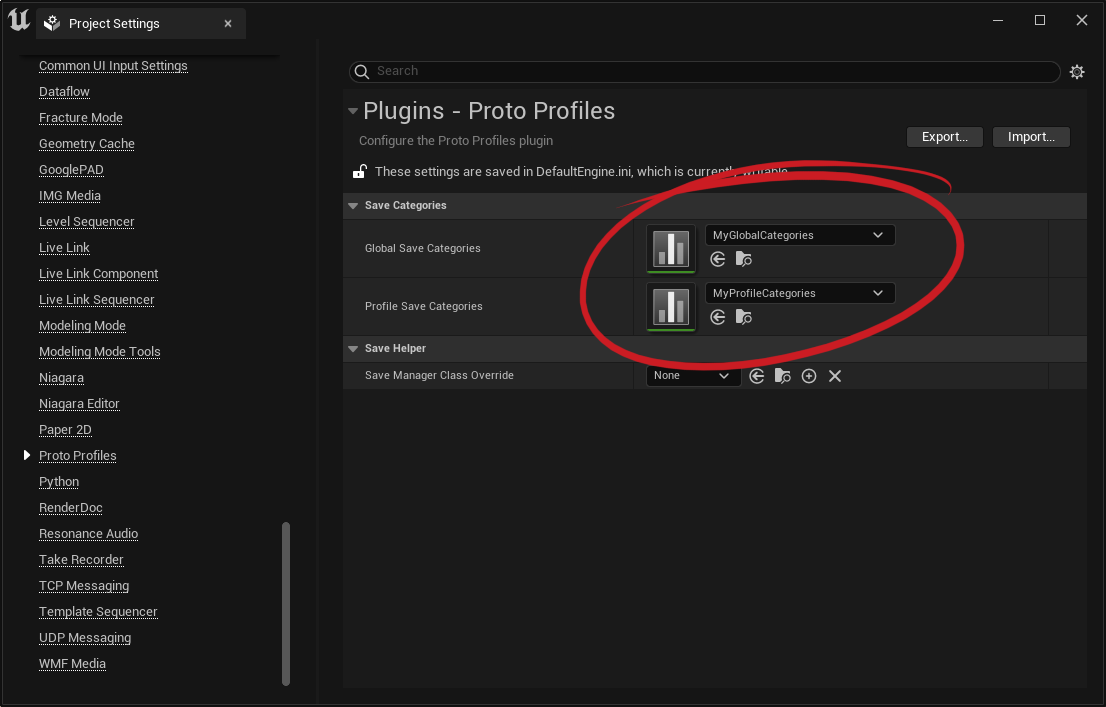
To set this up, open up your Project Settings by navigating to Edit > Project Settings. Then find the Proto Profiles settings in the list.
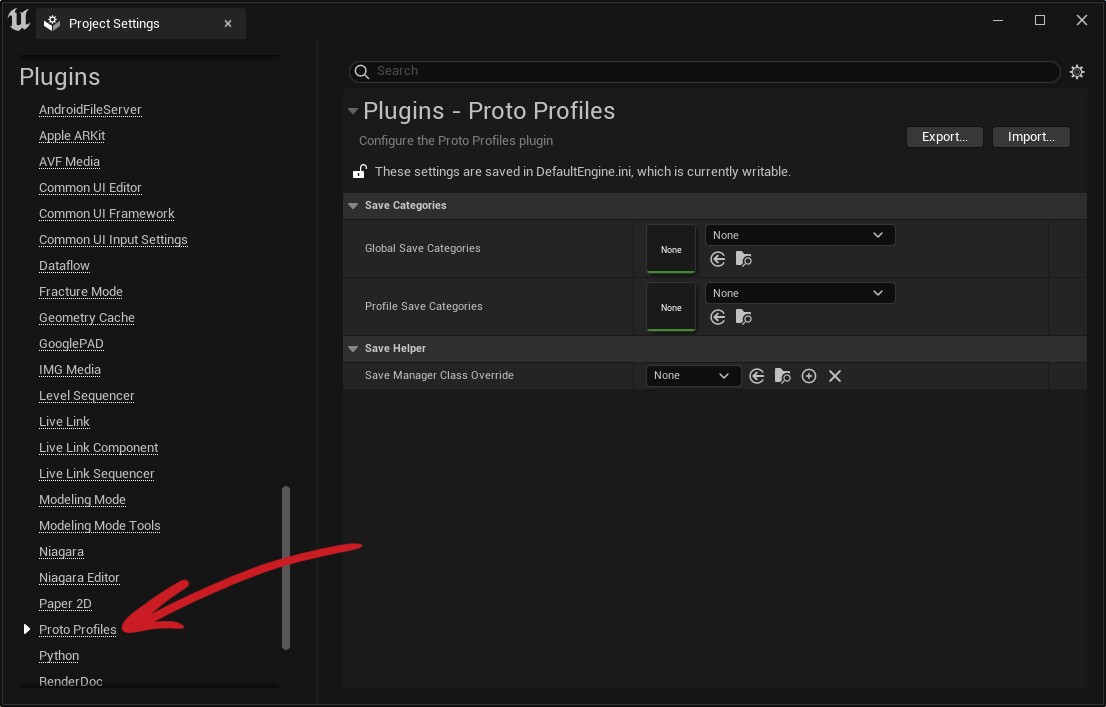
There are 2 important parameters to set:
- Global Save Categories
- The DataTable defining global Savefield Categories. Global means that 1 copy of each Category is saved by the game.
- For example, hardware options would typically be defined here.
- Profile Save Categories
- The DataTable defining profile Savefield Categories. Each Profile Category can have multiple copies saved by the game, with a given Profile name.
- For example, players’ game progress would typically be defined here.
You will need to fill these in with your project’s data.
For now, let’s make a copy of the included example DataTables, to use that as a starting-point for your project.
The example data is located in Proto Profiles & Options / Shared / Data.
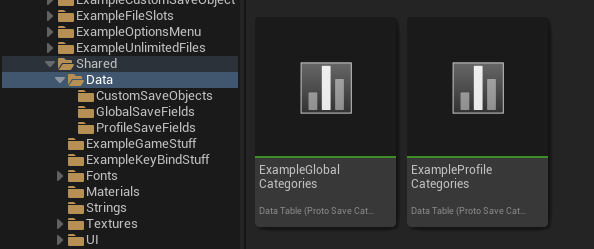
Select both and press ctrl+C to copy them.
In your project’s content directory, create a folder to hold your savefield data; for example Content / Data. Paste copies of the example DataTables and rename them.
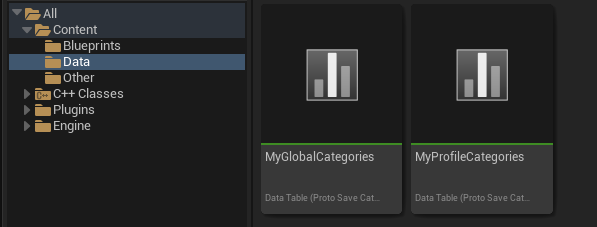
Return to your Project Settings. Set the Global and Profile settings to your new DataTables.
You’re now ready to run the example content, and are ready to use the example data as a starting point for your project!
In order for the example content to function correctly, the example savefield data must exist in your project settings.
You can still browse the example content and run it without its data defined. But it will throw errors when it attempts to access unknown savefields.
As you develop your project, I recommend you simply use the examples as blueprint reference. If you need to run the examples again, you can swap in the example DataTables to test, and swap back to your project’s data when finished.
Create a Save Category
Now let’s create our project’s first Global Save Category.
- A Save Category is a collection of Savefields.
- Each Save Category saves to its own file.
Open up MyGlobalCategories. You should see 3 example Categories used by the example content.
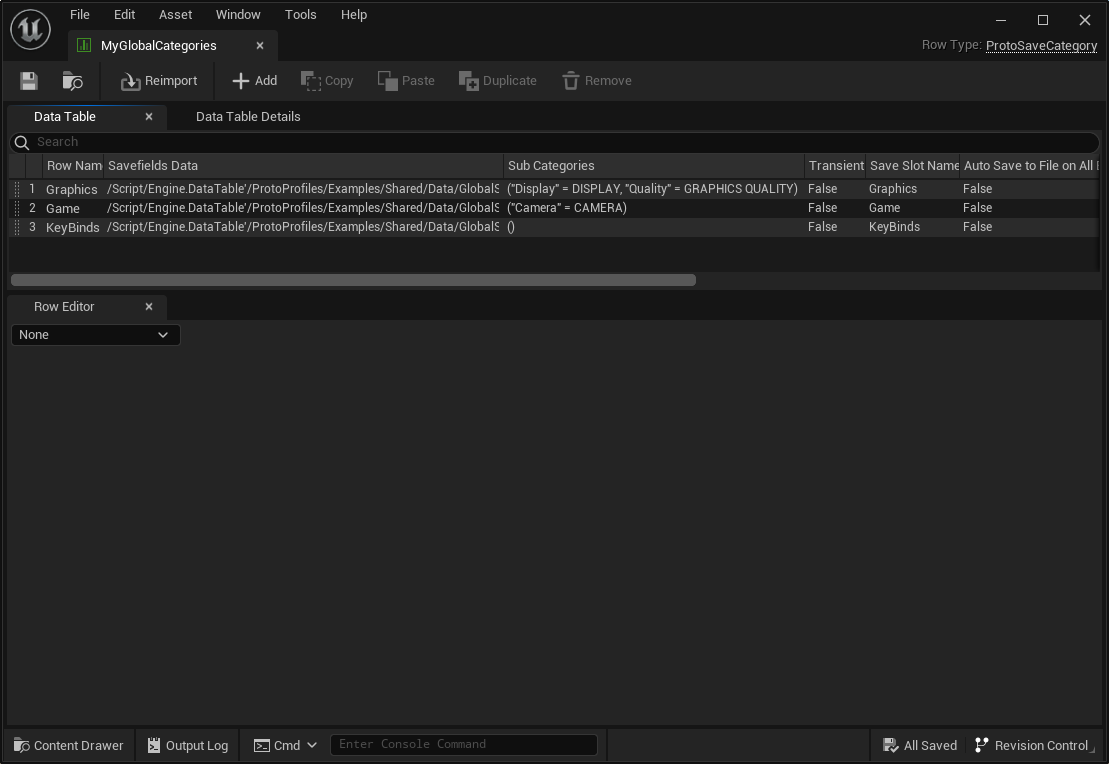
Each row in this table is a Save Category. You’ll see that each one references its own DataTable, which is its list of Savefields, which have their own parameters to define their behavior.
In your project I recommend keeping the Graphics example category permanently, editing as you need for your project’s graphics options.
The Game and Keybinds categories are stubs that you don’t need to keep. You can use them as a starting point for your own data, however.
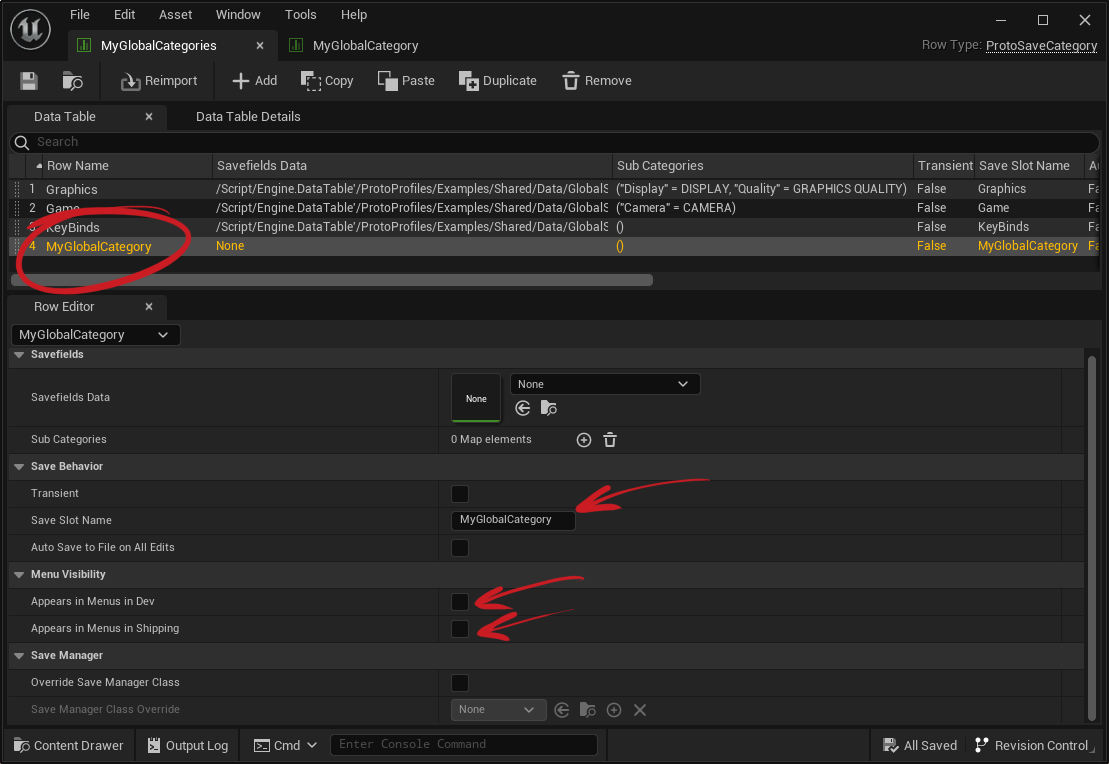
Press the +Add button to add a new row to the table. Let’s name it MyGlobalCategory.
The Row Name of each row is the FName that you will use to reference the Category in blueprints. Do not forget to give your Category a name!
There are a couple settings we’re going to change for this Category:
- Enter a string into Save Slot Name.
- This parameter must be filled in order to save to file, it is the name that will be used for the file.
- Uncheck Appears in Menus in Dev and Appears in Menus in Shipping.
- We’re not going to display this Savefield in a menu, so unchecking these parameters is an optimization.
Now we need to give it a list of Savefields.
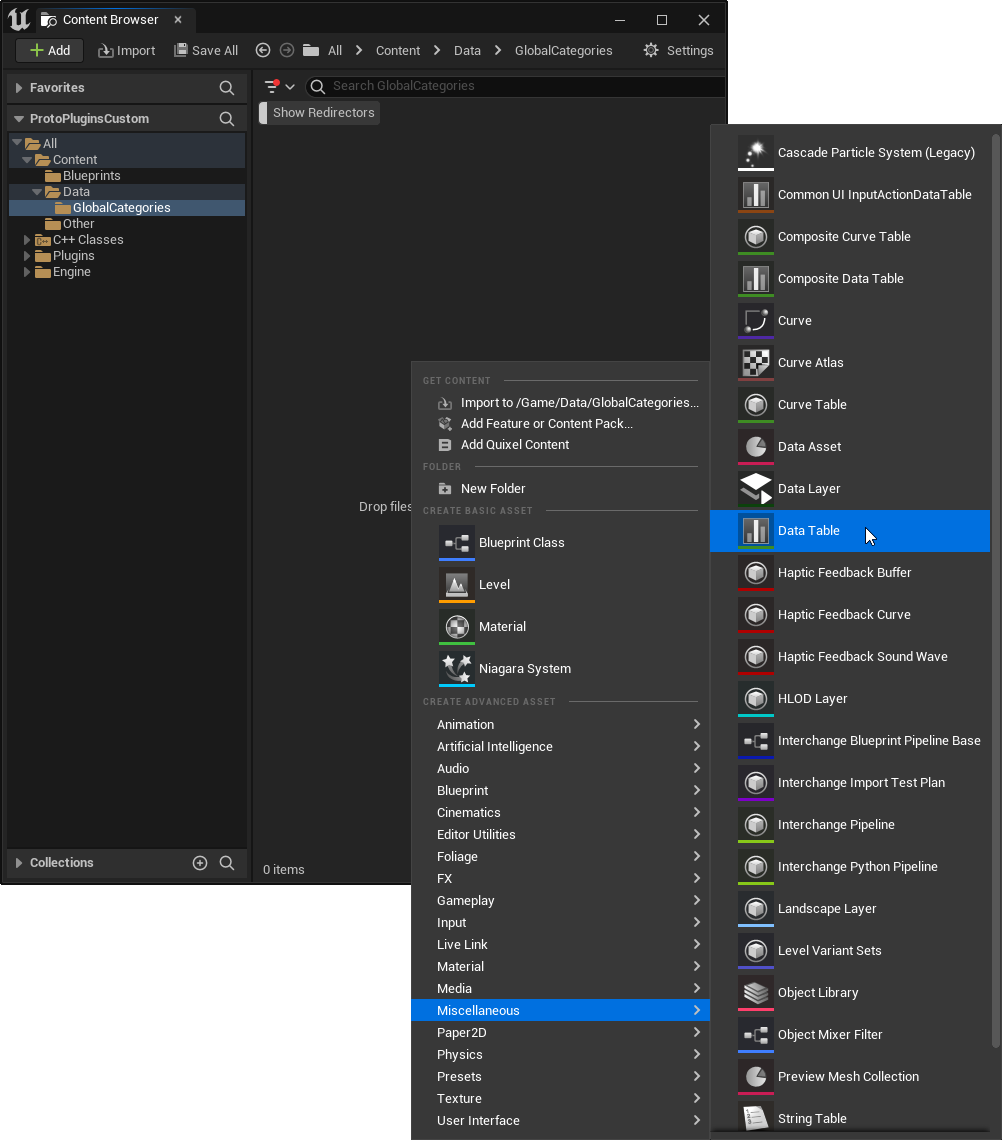
In the Content Browser, create a new sub-folder, Content / Data / GlobalCategories, and add a new DataTable using the struct ProtoSavefieldData.
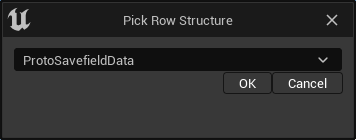
Name your new DataTable MyGlobalCategory. Open it, and add a new Savefield.
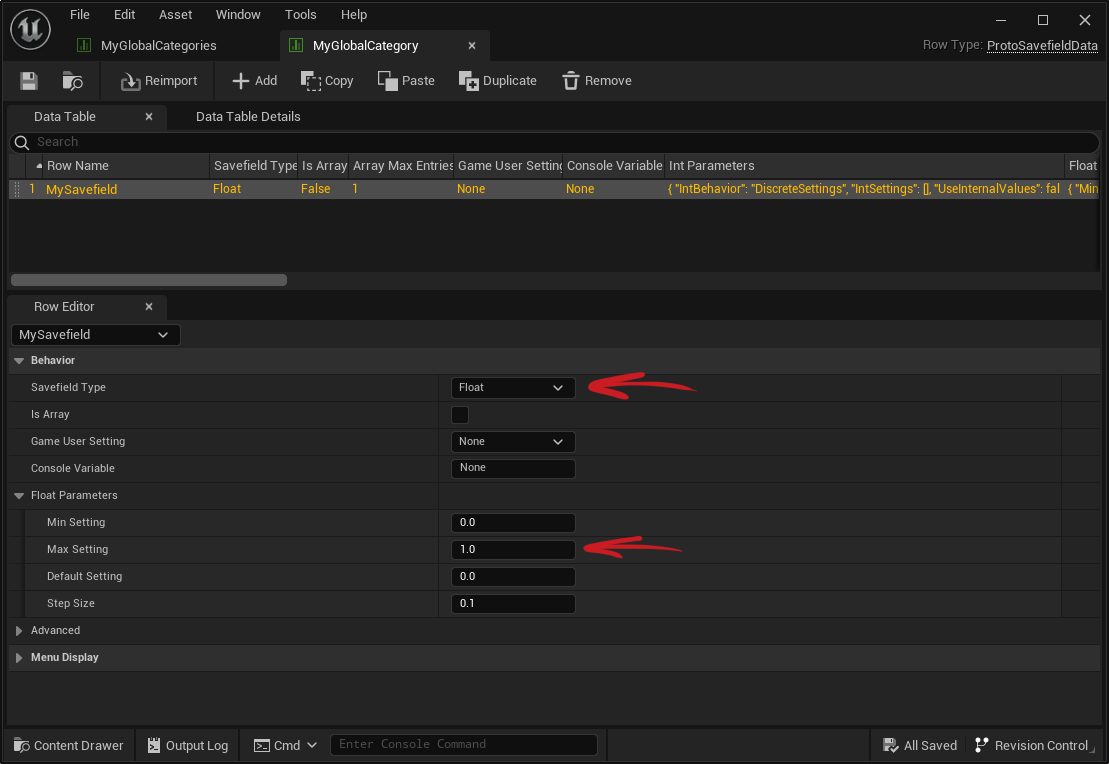
Just like with the previous DataTable, use the Row Name to name your Savefield. Let’s name it MySavefield.
As a test let’s set these parameters for the Savefield:
- Set Savefield Type to Float.
- Open Float Parameters, and set Max Setting to 1.0.
- This savefield will now be guaranteed to be between 0.0 and 1.0 (inclusive).
There’s one last thing we need to do, which is hook up MyGlobalCategory (the table of Savefields) with MyGlobalCategories (the table of Categories).
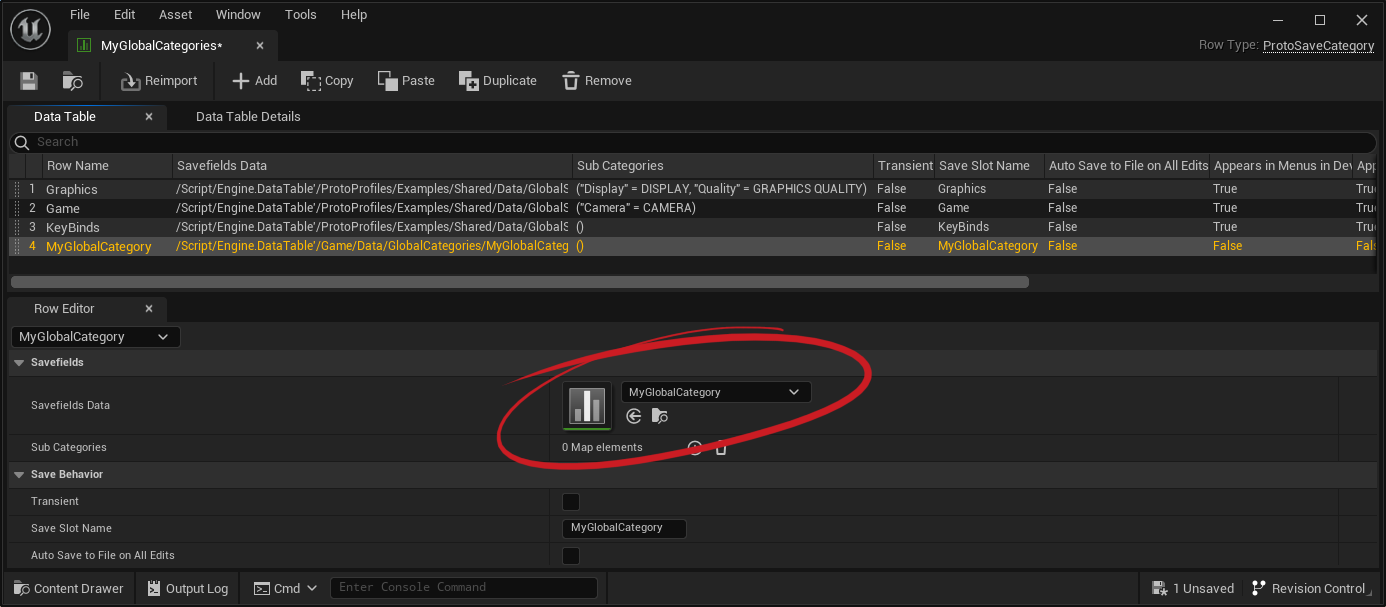
Your new Savefield is now ready to use! You’ll access it in Blueprint by using the FName “MySavefield”.
The current release of the plugin has a crash if you forget to supply a DataTable to a SaveCategory, and try to access a Savefield from the Category.
If you encounter a Fatal Error / crash, double check your Category, you may have forgotten to hook this DataTable up.
Create Simple Blueprint Logic
Finally, let’s put together a simple Blueprint to test our Savefield and learn the basics of how to use the plugin.
Create a new Level, let’s call it SavefieldTestMap. Then open the Level, and open the Level Blueprint. We’ll add some test nodes that run on Begin Play.
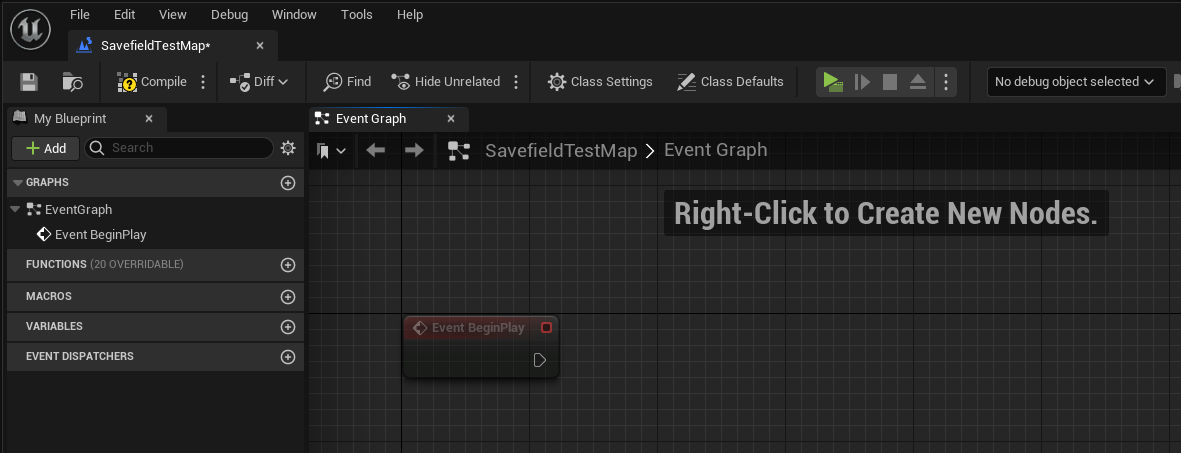
In order to use the plugin, we need to get a reference to the Proto Profiles Subsystem. The plugin has an Engine Subsystem that runs at all times. By calling functions on it, we can access our data and do just about everything we need to do with it.
Right click in the event graph, and search for “proto”. You’ll see the subsystem appear in the list of nodes.
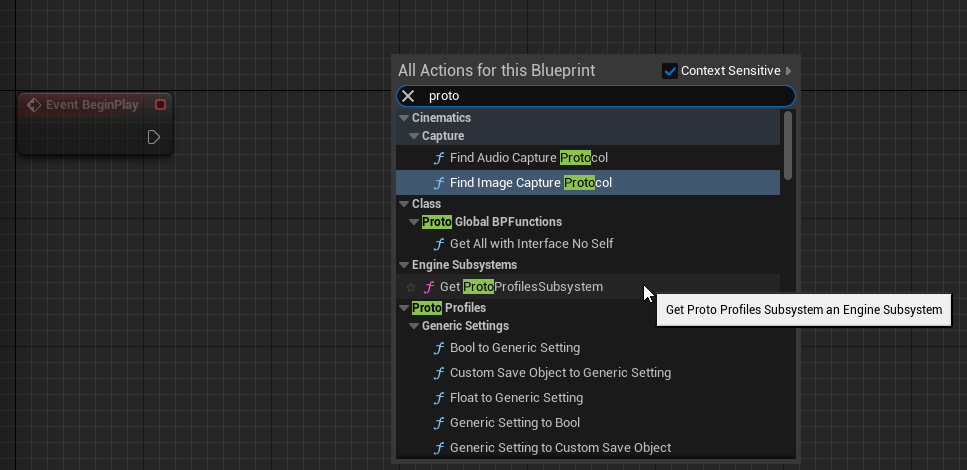
Nearly every function you need to use the plugin is called on ProtoProfilesSubsystem.
If there’s one thing to remember, it’s to get this subsystem.
Dragging pins off the GetProtoProfilesSubsystem node will allow you to search for functions you can call on it, and discover available functionality.
From the GetProtoProfilesSubsystem node, drag off the pin and search for GetSavefieldFloat.
With GetSavefieldFloat, you can enter the name of a float Savefield to get its value. In this case, leave the ProfileName parameter as “None”, as this is a Global Savefield.
Let’s make it so that when the Level starts, we print out the current value of MySavefield.
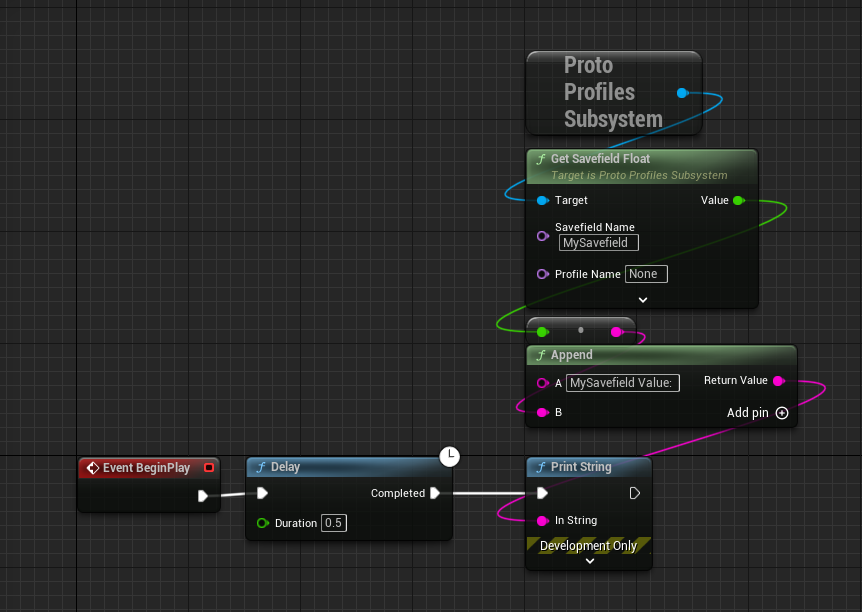
In this case, we used GetSavefieldFloat for a Float Savefield type.
Functions for other types follow this naming pattern of [Action][Savefield Type]. You can start searching for “GetSavefield”, or “SetSavefield”, and see flavors of those functions for different Savefield types.
Save the Blueprint and run Play-In-Editor. We should see it print out the default value for MySavefield.
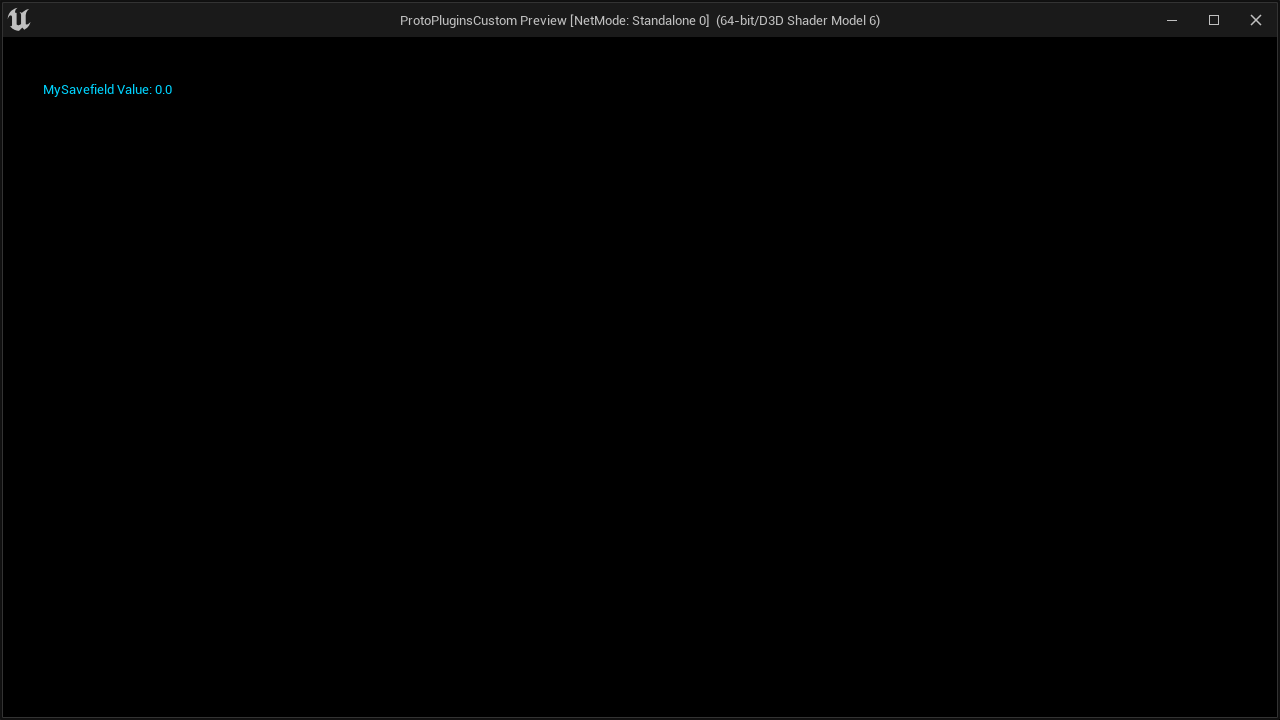
Note that no save file has been written yet, but the Savefield still worked.
- Even though a save file doesn’t exist yet, The Proto Profiles Subsystem has created a Save Manager for the MyGlobalCategory Category.
- When the Save Manager is created, it will load settings from-file if a file exists. If not, it will populate the values of each Savefield with defaults.
- No save file will be written until we call Save.
- Or, if the Category is set to auto-save, when we Set a new value for a Savefield.
Now, let’s set a new value for the Savefield, and print it out again.
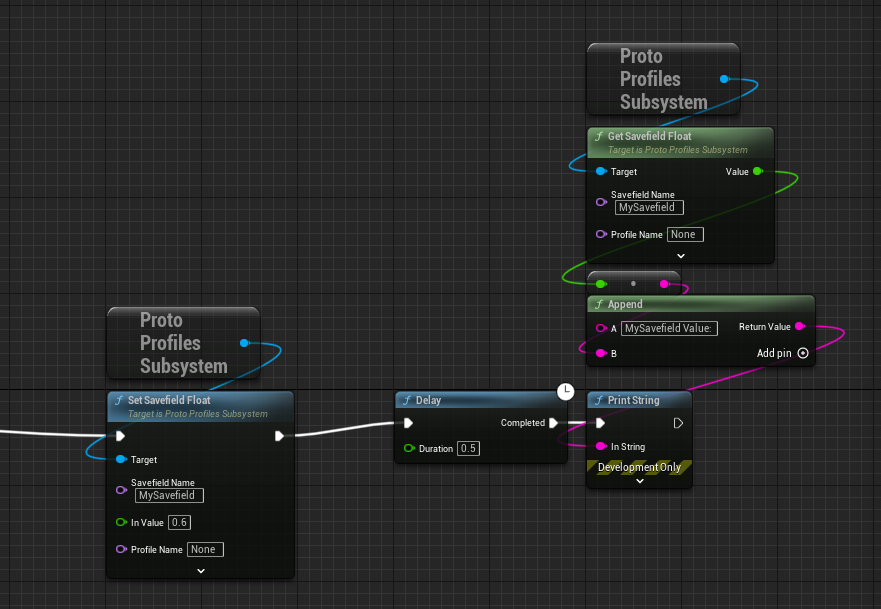
Now when you run the map, you will see it print twice.
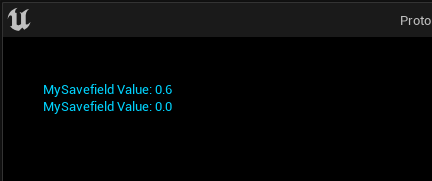
Notice that every time you run the map, it prints 0.0 then 0.6. This is because we are not saving the value yet, so the first print is still printing the default.
Saving
We can save 2 different ways:
- Manually call SaveGlobalCategory.
- Change our Category settings to auto-save when a Savefield is modified.
For now, let’s manually call SaveGlobalCategory.
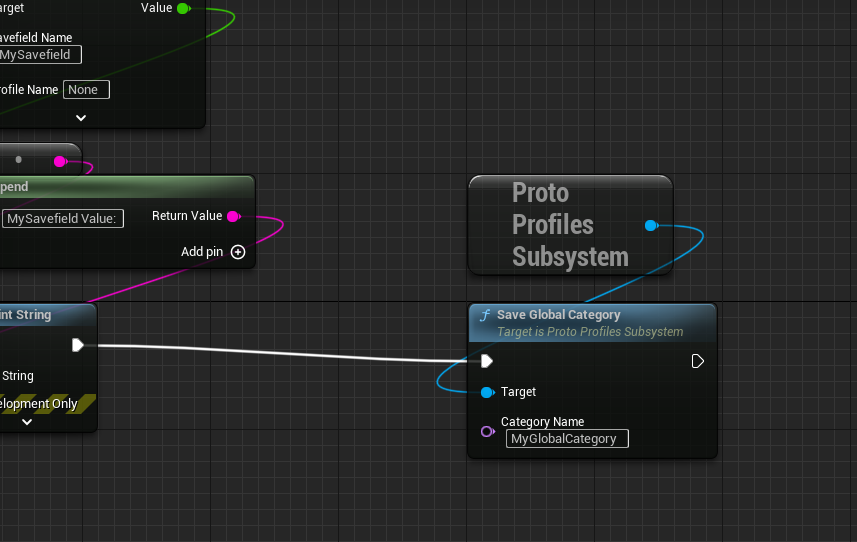
Now on multiple runs of the Level, we see that the value of 0.6 sticks.
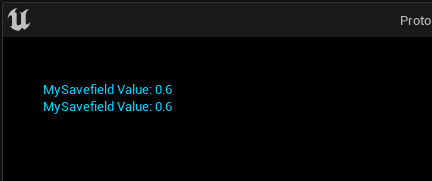
If we navigate to our Project Folder, and then the subfolder / Saved / Save Games, we will find that a new save file has been saved.

Reverting
Now as one last addition, let’s try reverting our Savefield. The Revert function will set the Savefield back to its last-saved value.
Let’s do another SetSavefieldFloat, followed by a print, followed by RevertGlobalCategory, followed by another print.
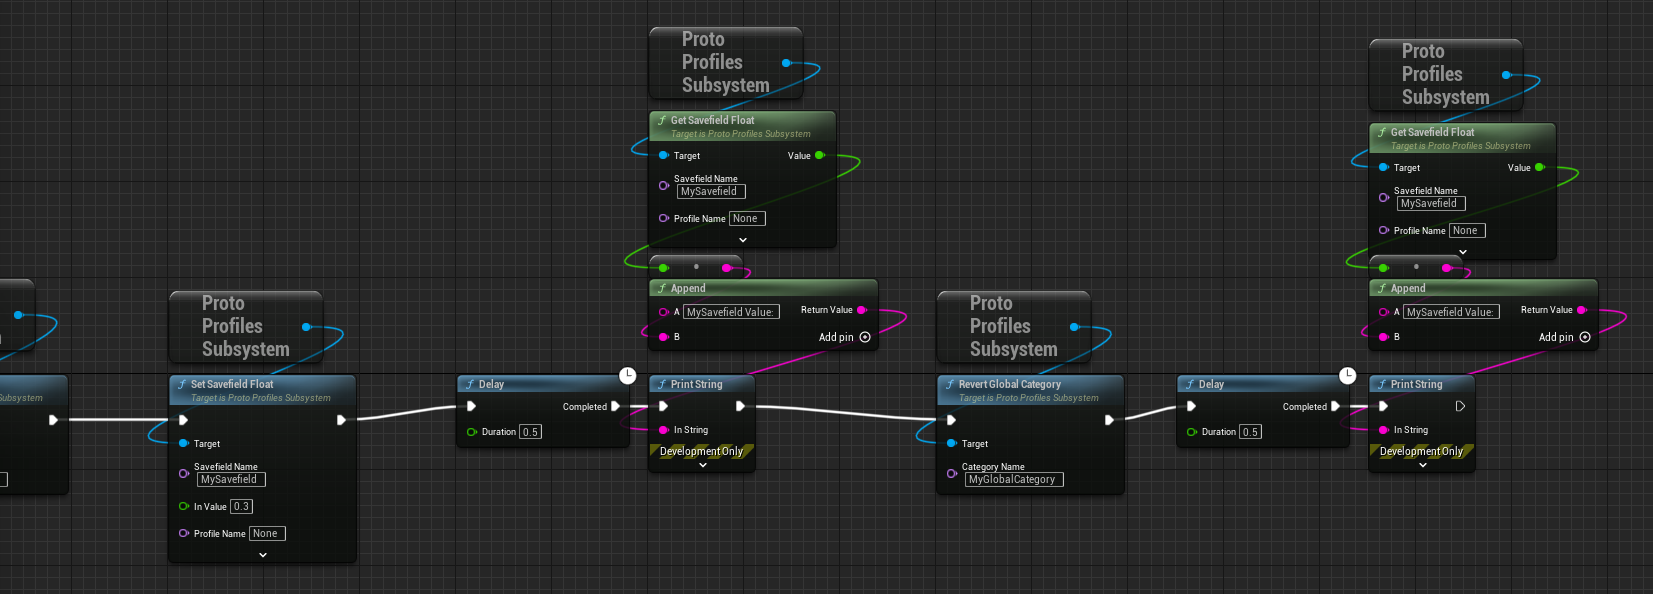
Now when we run, we will see the value change to 0.3, but then back to 0.6 after the revert.
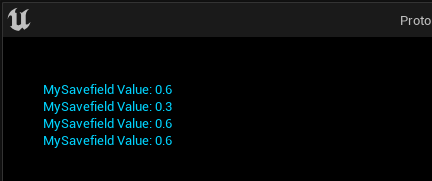
This scratches the surface on basic operations in the plugin! From here, you can explore more functions available on the ProtoProfilesSubsystem.
In this simple example, we called these functions all in one Level Blueprint.
In your project, you can reference the Substem and call its functions anywhere where Blueprint nodes exist.
For example, you can Set a savefield in a player Blueprint, and then Get the value of that savefield in a UI Blueprint.
Next, you can check out the Example Levels included with the plugin. These show off various functionality, and are a great reference to use when learning how to accomplish practical features.
Conclusion
Now that you know the basics, you can get started working on your project’s save features.
Explore the rest of the PROTO Profiles & Options documentation for more details on other features.